Setting Up Your Xbox Series S: A Step-by-Step Guide
Unboxing and Getting Acquainted
Let’s start by taking a look at what comes in the box. You’ll find:
- An Xbox Series S
- A high-speed HDMI cable (essential for the best resolution and frame rates)
- A power cable
- A controller with two AA batteries
It’s a pretty straightforward package! Let’s explore the console itself:
On the front, you’ll notice the absence of a disc drive. This is an all-digital console, so everything you play will be streamed or downloaded. There’s also a single USB port on the front. The sync button for your controllers is located at the top.
The back of the console is where the action is:
- An Ethernet port for wired internet connection
- Two additional USB ports
- An HDMI out port
- A storage expansion slot
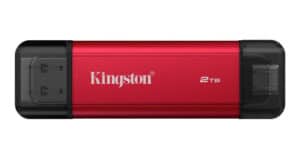
The Xbox Series S comes with 512 GB of SSD storage built-in. If you need more space, you can use external USB drives for older Xbox games. However, to expand storage for newer Series X/S enhanced games, you’ll need dedicated storage cards which are more expensive but offer a seamless, plug-and-play experience. These cards utilize Xbox Velocity Architecture, a proprietary technology for enhanced performance. Keep in mind that third-party options will be available in the future.
Connecting and Setting Up
Now that we’ve gone over the basics, let’s get everything plugged in. Connect the Xbox Series S to your monitor via the HDMI cable and plug in the power cord. For this setup, we’ll be using a wireless connection.
The next step is to set up the console using your smartphone. Download the Xbox app from the App Store or Google Play. If it’s your first time signing in, the setup console option will be readily available. Otherwise, navigate to your library, tap on consoles, and select “Set up a console.”
On your screen, you’ll see a code. Enter this code on the Xbox app to connect your phone to the console. Choose your language and location, then select either wired or wireless connection. In this case, we’ll opt for wireless.
After connecting, the console will likely prompt you to download a system update. This update might take a few minutes but is essential for the console to function properly. Choose between energy-saving and instant-on power modes. Instant-on allows for faster startup times while keeping it in a low-power state when not in use. Security preferences let you choose your sign-in method, allowing you to enable instant sign-in, keep games and apps updated in the background, and activate remote features. Choose settings based on your preference.
The last step in the mobile setup involves giving your console a name, choosing whether you want promotional messages, and deciding whether to copy settings from another Xbox (in our case, we’ll start fresh). After completing these steps, you’ll need to wait for the update to finish on both your phone and the console.
Updating Controller and Display Settings
Once the update is complete, you’ll be prompted to update the controller. Keep the controller still and turned on while it applies the update wirelessly.
After updating the controller, the system will guide you through display settings. Enable advanced video features for the best picture quality. Adjust the resolution to your preferences. The setup process ends with the Xbox homepage, similar to the previous interface but with a sleek, modern look.
Exploring Storage and Next Steps
Take a look at your storage options. You’ll see that the console comes with 512 GB of storage, and you’ll have a certain amount available for use. You can view content and manage storage as needed. Don’t forget that you can add storage using external USB drives and dedicated storage cards to expand the Xbox Velocity Architecture storage for newer games.
This setup guide is just the beginning. We’ll explore the Xbox UI in a future video, as well as cover data transfer from an Xbox One to the Series S. Be sure to check out our setup guide for the Xbox Series X and our video on Xbox One X to Xbox Series S data transfer.
That’s it for this initial setup guide. Thank you for watching!


