How to Download and Create a Bootable USB Drive for Windows 11 Insider Preview
This article will guide you through the steps of downloading and creating a bootable USB drive for Windows 11 Insider Preview. You can use this method to create a bootable USB drive for Windows 10 as well.
1. Download Windows 11 Insider Preview
- Go to uupdump.net.
- Scroll down and find “Windows 11 Insider Preview”.
- Select the “amd64” version unless you need the “arm” version for your specific device.
- Choose your language (English in this example).
- Select the specific version you need. Choosing the correct version will save you download time.
- Click on “Download or convert to ISO”. This will create the ISO file for you.
- Click “Create Download Package”.
2. Extract the Download Package
- Once the download finishes, open the downloaded ZIP file.
- Extract the folder containing the download files to your desktop or another accessible location.
3. Download and Run the Windows Command
- Open the extracted folder and find the “Windows” command.
- Right-click the command and select “Run as administrator”.
- The download and ISO creation process will begin.
- This process can take anywhere from 30 minutes to an hour and a half depending on your internet speed and chosen version options.
4. Create the Bootable USB Drive
- Once the download is complete, you’ll find the ISO file in the folder.
- Download and run Rufus (link in description).
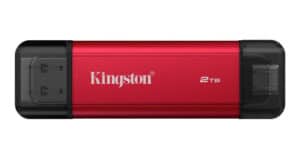
- Ensure your USB drive has at least 16 GB of storage available.
- Plug in your USB drive and select it in Rufus.
- Important: Rufus will erase all data on the USB drive. Make sure to backup any important files before proceeding.
- Under “Select”, choose the downloaded ISO file.
- Leave the other settings at their defaults, including the partition scheme, target system, and volume label.
- Click “Start” to begin the bootable drive creation process.
- The process can take some time depending on the speed of your USB drive.
5. Finishing Touches and Installation
- Once the process is complete, you should see a “Ready” status and a green bar in Rufus.
- Be aware that some devices may have “Secure Boot” enabled, which you might need to disable before installing Windows.
- Plug the USB drive into the device you wish to install Windows 11 on.
- Boot from the USB drive to begin the installation process.
Additional Notes
- If you’re using a virtual machine like VMWare or Virtualbox, you can simply mount the ISO file without creating a bootable USB drive.
- Always back up your important data before attempting any system updates or installations.
- The Windows Insider Program offers different release channels, allowing you to choose the stability level you prefer.
- If you encounter any issues, refer to the official documentation or seek assistance from Microsoft support.


